
To migrate custom field values along with Files or Attachments, create a field mapping in Salesforce before starting the migration.
Steps to create a field mapping:
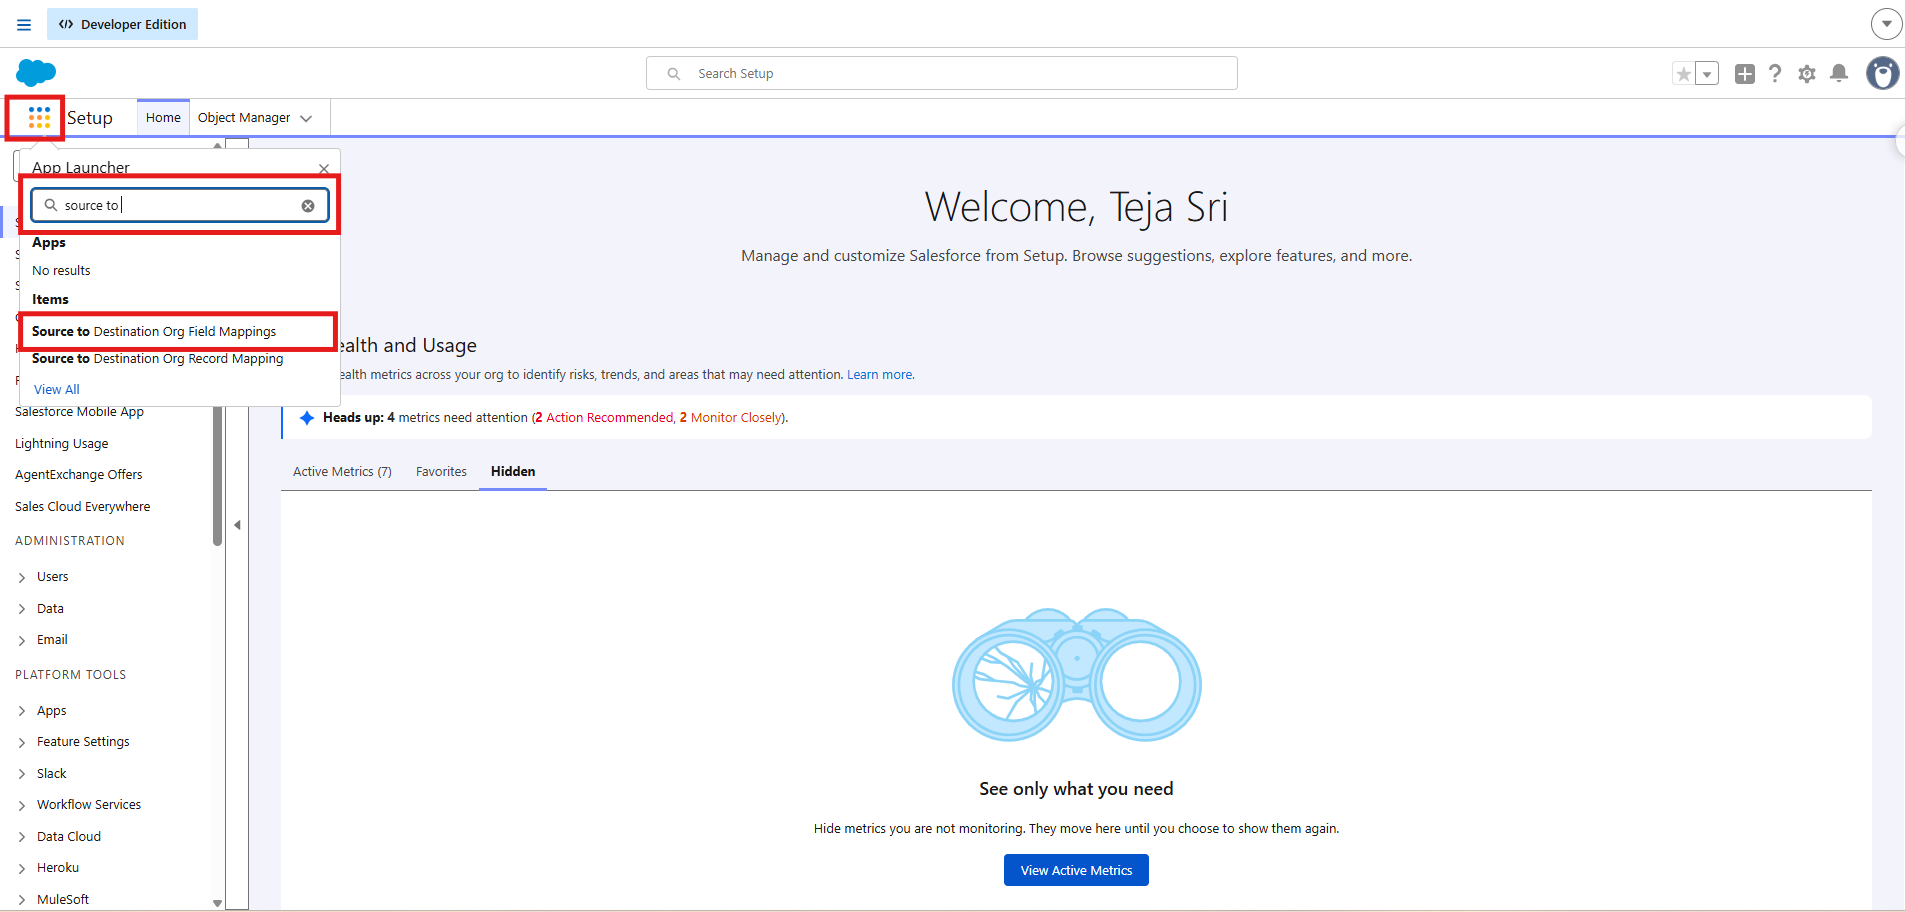
- Open the App Launcher in Salesforce and search for Source to Destination Org Field Mappings.
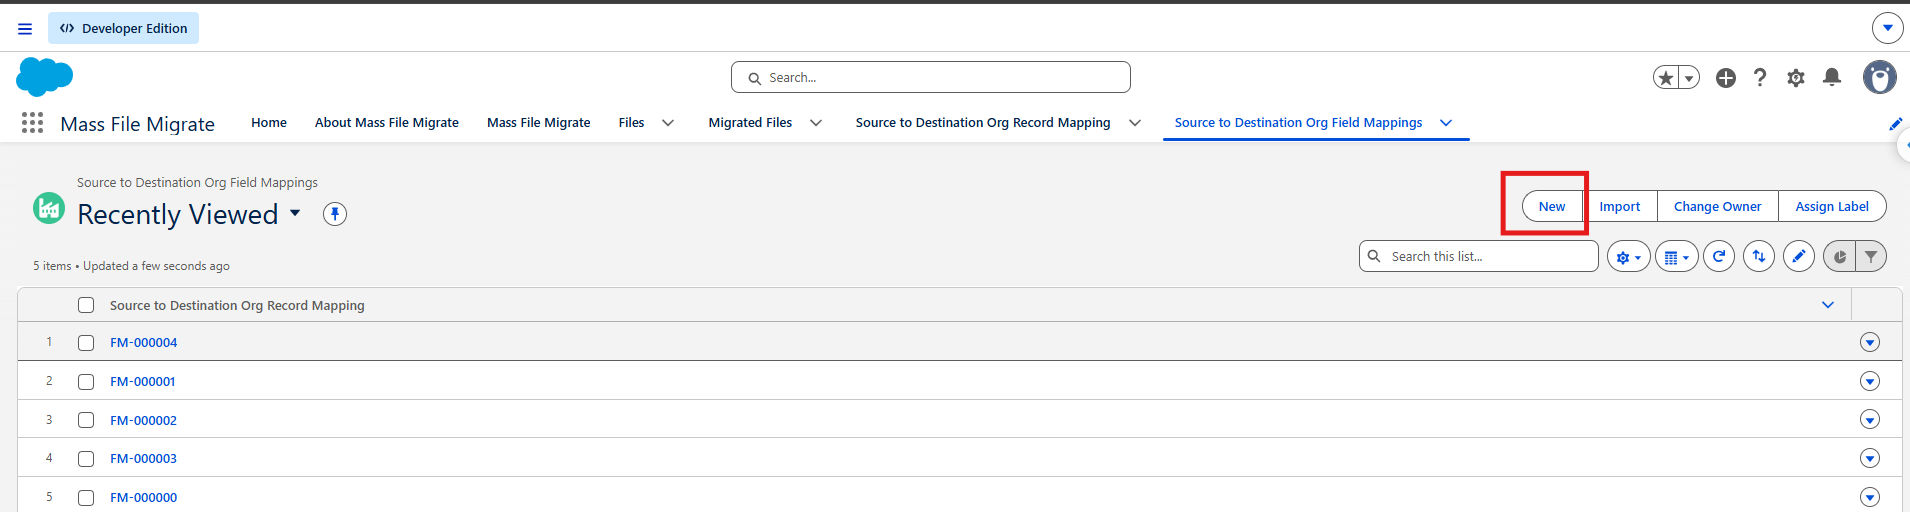
- Open the object and click New to create a field mapping record.
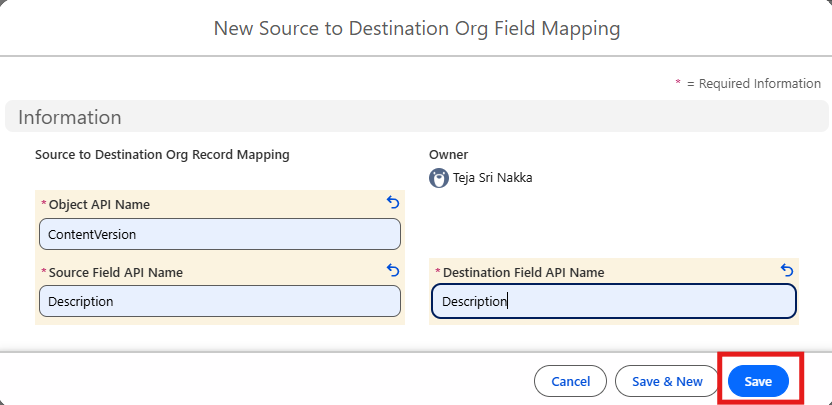
- Enter the following details:
- Object API Name: Enter ContentVersion for Files or Attachment for Attachments.
- Source Field API Name: Enter the API name of the field whose value you want to migrate. For example, Description or the API name of a custom field.
- Destination Field API Name: Enter the API name of the corresponding field in the destination org. If the field has the same API name in both orgs, enter the same API name here.
- Ensure that the corresponding destination field exists in the destination org and that the field types are compatible.
- Click Save to save the field mapping.
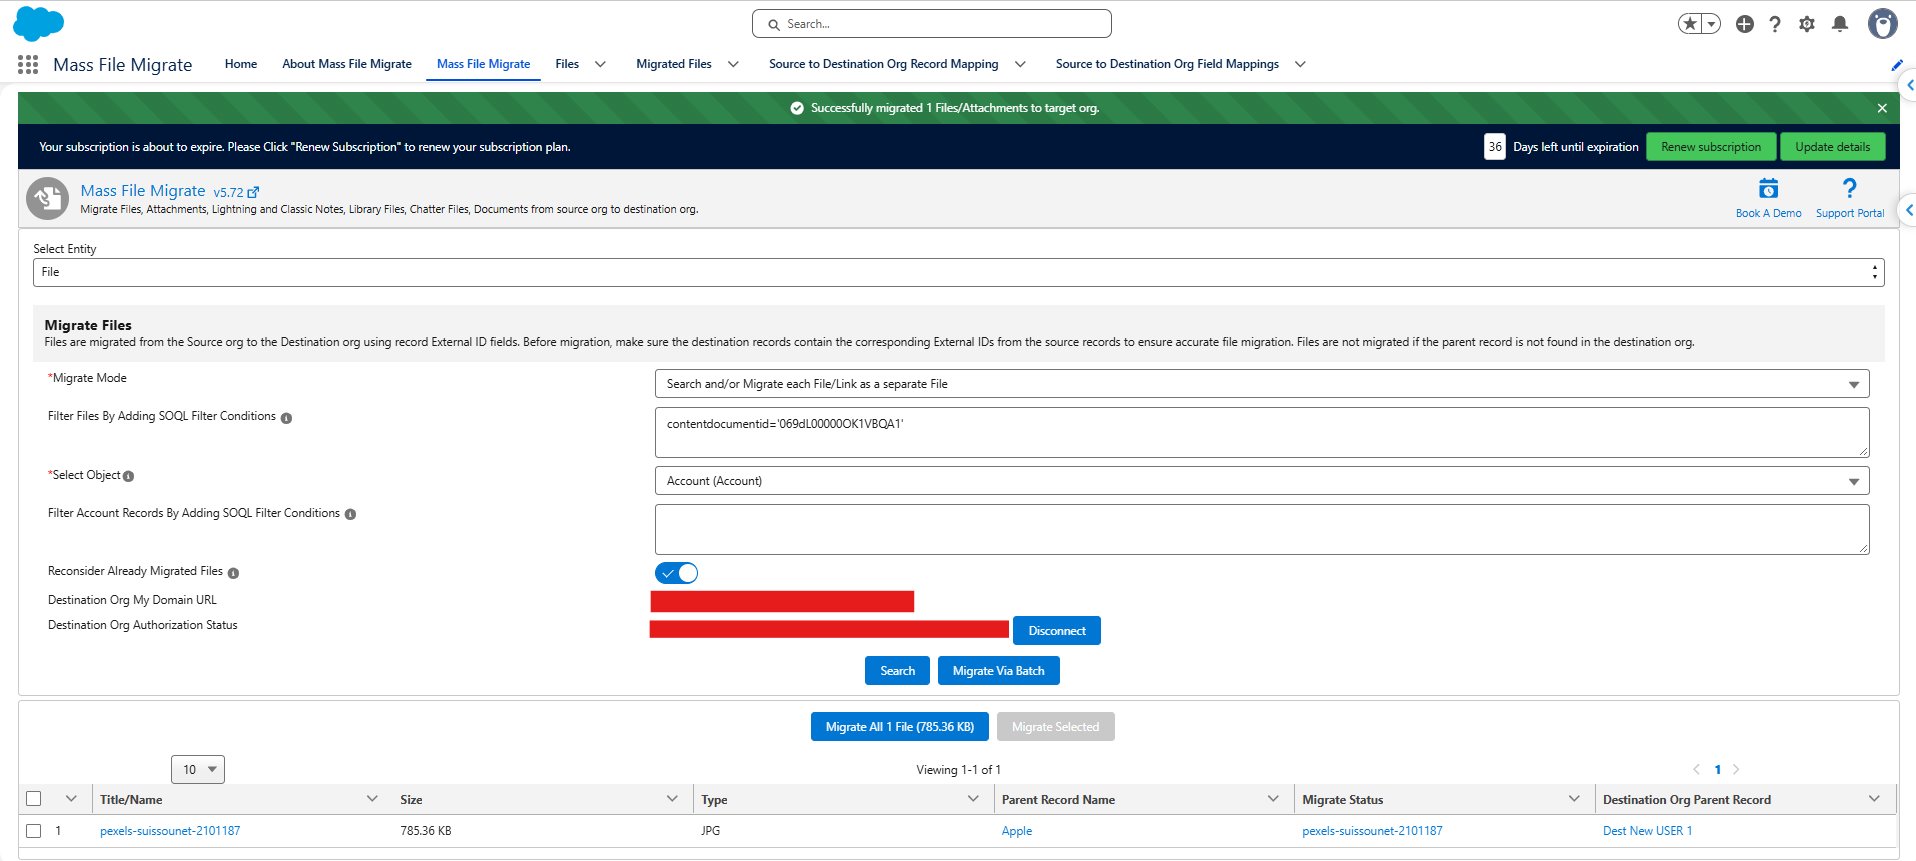
- Navigate to the Mass File Migrate (MFM) tab and start migrating the required files or attachments.
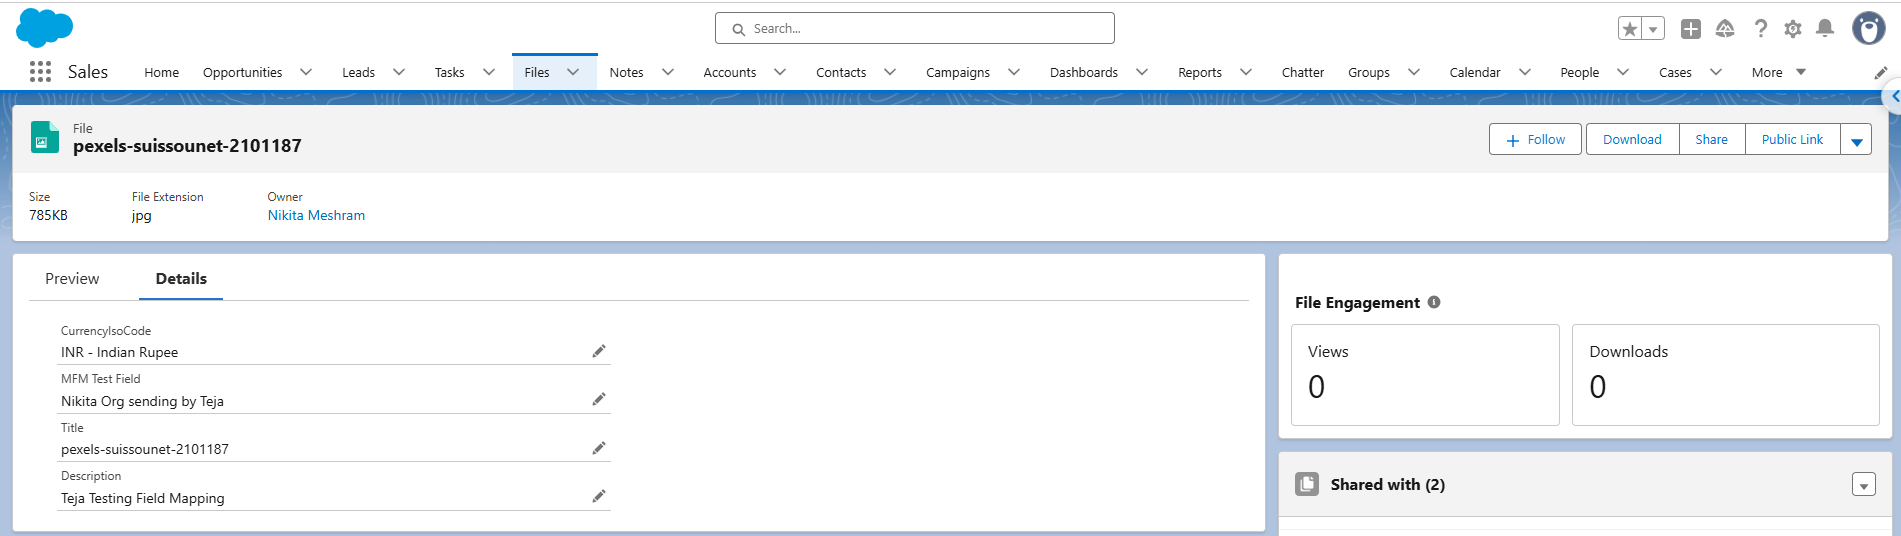
- After migration, open the destination org and verify that the mapped field values have been transferred correctly.
PS: View Mass File Migrate Salesforce file migration app on Salesforce AppExchange:
https://appexchange.salesforce.com/appxListingDetail?listingId=e9874a66-2001-4e3d-8a29-3a2ed7f584c4